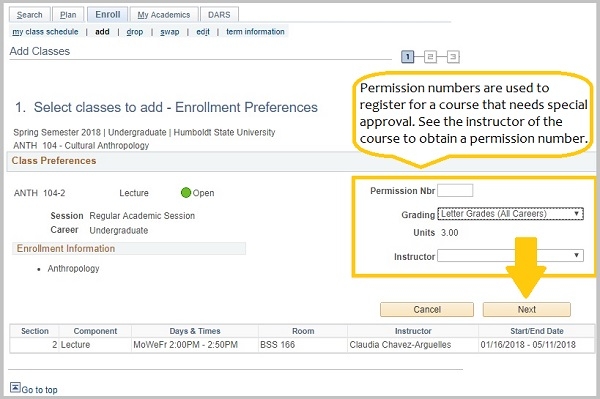
Once registration begins, you can add classes in your Student Center until the Add deadline. During the second week of classes, you will need instructor approval (a permission number) to register for any class. Contact the instructor for the course to request a permission number.
Step 1 - Login to Student Center.
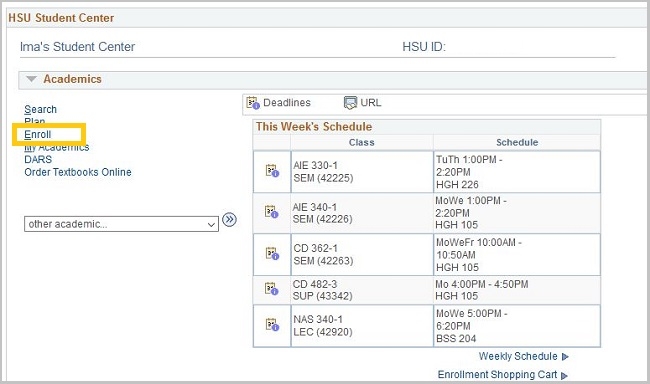
Step 2 - Click Enroll in the Academics section.
Step 3 - Select the appropriate term and click Continue.

Step 4 - Click Search and continue to Step 5 (or enter the 5-digit class number in the Class Nbr field and click "Enter". Skip to Step 7.)
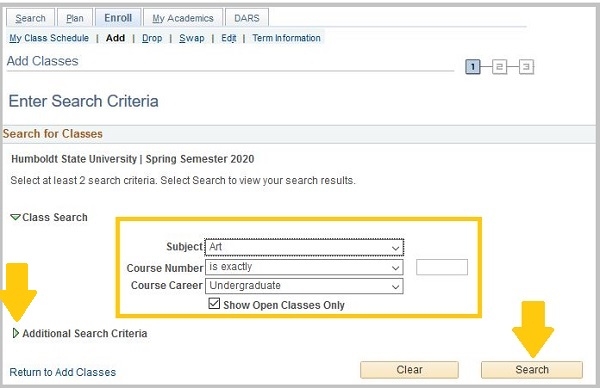
Step 5 - Enter your search criteria using the "Subject", "Course Number" and/or "Course Career" drop-down lists. Click the arrow "Additional Search Criteria" to search by "Course Attributes", such as General Education, Online and Service Learning.
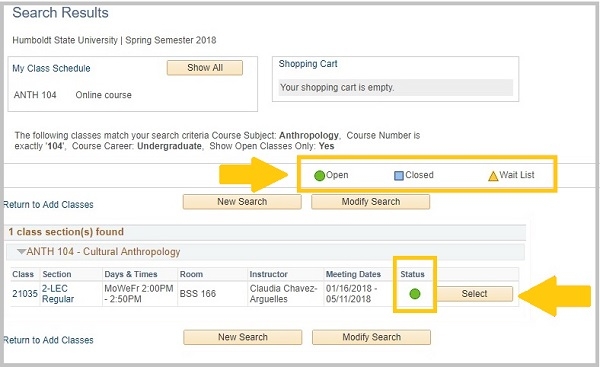
Step 6 - Check “Show Open Classes Only” to exclude closed classes or leave unchecked if you are want to use Wait List for a closed class. Click Search.

Step 7 - A window will open with the results of your search. Locate the class you would like to add and click Select. If the course is open (green circle in the Status column), the Enrollment Preferences page will open. If your search included closed classes, a course with a yellow triangle in the status column may be wait listed.
Step 8 - Enter a permission number (if required) in the Permission Nbr field.
Step 9 - Select the type of grading (for classes with optional grading modes, using the Grading drop-down .
Step 10 - Click Next.
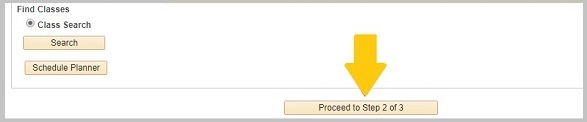
Step 11 - The class is now added to your Enrollment Shopping Cart. At this point you may go back and search for more classes to add to your cart or click "Proceed to Step 2 of 3" to continue the enrollment process.
Step 12 - Review your schedule and click "Finish Enrolling" to confirm your enrollment.

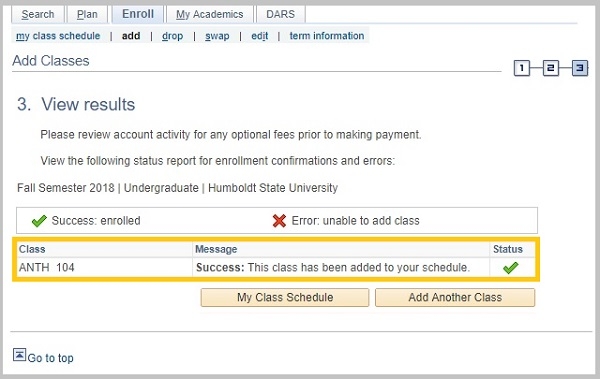
Step 13 - Review the status to make sure you are enrolled in the class . You should see a message, "Success: This class has been added to your schedule" and a green check mark in the Status column. If you see a red "X" in the status column, you are not registered in the class.